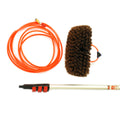

Inserting the orange water tube into the pole:
Put the pole on the ground or on a bench top. Open the top lock and extend the pole only about 10cm until you can see the oval opening. This is where the tube will come out.
Place the tube into the hole at the bottom of the pole. As you feed it through, you will feel it hit the different sections of aluminium inside the pole. Turn the pole and wiggle the tubing as this will help the tube continue to feed to the end of the pole.
When you get towards the end, the tube may pop out, but it can be a little fiddly. What you do next depends on which side the tube is sitting. If the tube is sitting on the right-hand side, turn the pole to the left in an anticlockwise direction while you hold the tube. If the tube is sitting on the left-hand side, turn the pole to the right in a clockwise direction while holding the tube. The tube will then pop out through the oval window.
Attaching the Brush Head:
Now you can put the head on. Screw it on in a clockwise direction. A little tip to get it nice and tight: hold it against a bench and rotate the handle. This will tighten it up securely.
Pushing the tube into the connector:
These are push-in connectors, so the tube simply pushes in. However, when you want to disconnect it, you need to hold back the blue spring-loaded collar while pulling the tube out at the same time. So, to connect it: push the tube in. To disconnect it: hold the blue collar back and pull the tube out.
Connecting the brass connector on to your garden hose:
In Australia, our garden hoses commonly use a generic type of quick-connect fitting. Simply push the brass fitting into the female hose fitting. Do not pull the outside sleeve of the hose, just push it straight in.
Now you are ready to go, that’s how easy it is!
The tool in this guide: Plush Water Brush Kit with 5 Metre Pole | Plush Water Brush Kit